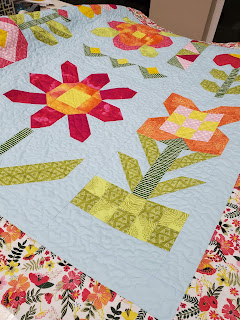
Bindings. Love them or hate them, they're the (mostly) required last step to finishing your quilt.
I say mostly, because you can finish a quilt by doing the envelope thing ( I call it envelope style...where you turn it inside out, sew around the edge, leave some open, turn it right side out, then top stitch) There's probably a "real name" for the technique but it's coming up on 11pm as I write and I can't think of it. Pop it in the comments if you think of it! I digress.
But there's a ton of different ways you can do a binding, and since I feel like I've done nothing but bindings lately, I thought we could do a little primer. If you're a more experienced quilter some of this may seem like, "No duh!" but for beginners and less confident quilters some of these basics will help you when you reach your binding.
How wide should you cut your binding?
Well, that's kind of up to you and what you prefer. The most common binding strip widths are 2.25" and 2.5". Mom prefers 2.25" because she likes her bindings a little narrower and tighter. I like mine at 2.5" because I can easily reuse the leftover strips as non-binding scraps if I want to. Some folks go as narrow as 1.75", and others was wide as 3". It really depends on what you like. A consideration though, is how thick your quilt sandwich is. If you've got a flannel top, high loft batting, and a minky backing, 2.25" might be a skosh too narrow. If you have a cotton top with a low loft batting and a cotton back, maybe 2.25" is just right!
How do you know how much binding you need?
Most of the time, the pattern will tell you the yardage you need and how many strips. But you won't always necessarily have the pattern handy, or even be using a pattern at all. So you need to know how to calculate it yourself.
1. Measure your quilt's length and width. For the sake of example let's say your quilt is 65"x 85"
2. Multiply both measurements by 2 (to account for all 4 sides) and add them together to get the number of inches around the sides of the quilt. EXAMPLE: (2 x 65) + (2 x 85) = 300
3. Most of the time you'll be using 42" strips for your binding. Divide the total by 42 to see how many strips you need. EXAMPLE: 300/42 = 7.14. Always round your answer to the next whole number - so, 8.
4. You need 8 strips for a 65"x85" quilt. Decide how wide you want your strips to be. I like 2.5". EXAMPLE: 8 x 2.5 = 20. You'd need 20" of fabric for your binding. 2/3 of a yard will do ya!
When do you need to use bias binding versus "regular?"
Bias is used when you have an irregular edge like a scallop or maybe a hexagonal shape (think Grandma's Flower Garden). The bias is good and stretchy so it will help move around those funky shapes better than a regular WOF strip. Or, maybe you chose a stripe or plaid, but want it on the diagonal - bias is good for adjusting the pattern on the binding strips too.
What is the right way to put the binding on?
Trick question! There's not a right way to do it because it depends on what look you like and what works best for you. Some people like to stitch it down by hand, and others by machine. Some people like to use a cool stitch on their machine to add a little flair! I like to do mine by hand because I feel like I have more control, especially in the corners, and I also am phenomenally bad at doing it by machine. Mom likes to do hers by machine because it is fast and easier for her, and it turns out great! You're no more or less of a quilter for doing it either way. You'll find which you like better, and do it that way.
How do you pick a good binding?
This is totally and 100% subjective. Choose what your eye likes. Use a solid, use a stripe, use a print, a batik...whatever you want! Like anything else in quilting, there's no Quilt Police that are going to rappel from your sewing room ceiling to slap the fabric out of your hands (if this happens, please let me know, I have some real questions). I think it's a good idea to wait until you have your quilt quilted to pick the binding. Why? Because sometimes what we think will work ... doesn't. Here's a real-time example!:
I was at the shop earlier tonight to pick a binding for the sample I just finished quilting.
But I went to cut it and when I saw it up against the quilt, I didn't like it. I mean, it's fine. Nothing wrong with it at all. It's a solid, safe choice. But for me it was too matchy-matchy and just didn't do much for me.
So I looked around awhile and landed on this green. I expected to hate it. But I didn't! I really liked the dark edge, and pulling a punch of green out more into the border area.
I hope this helped give a little food for thought when picking your binding! How do you like to do your bindings? Let us know in the comments!


No comments:
Post a Comment
Start or join the discussion by leaving us a comment below! Please keep comments kind and constructive.